
マレーシアでは、個人で確定申告をしなければならないが、オンラインでできる、ここでは、会社員/非居住者(e-M Form)の初申告の流れを紹介(2023/3/26)
はじめに
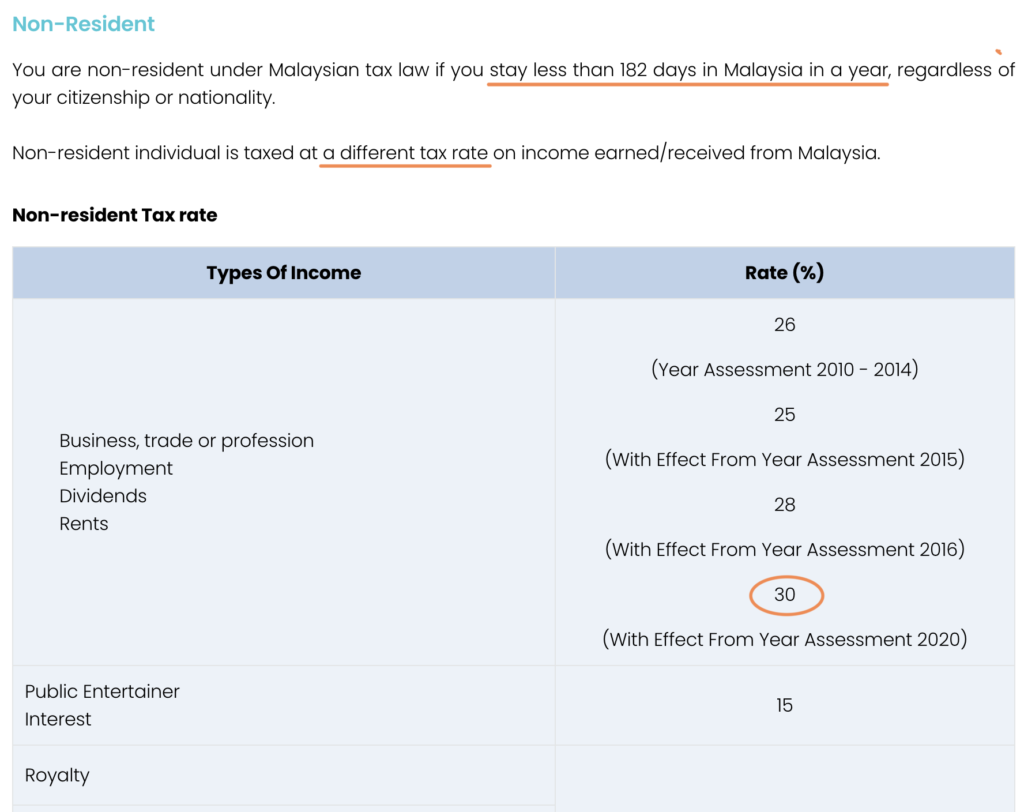
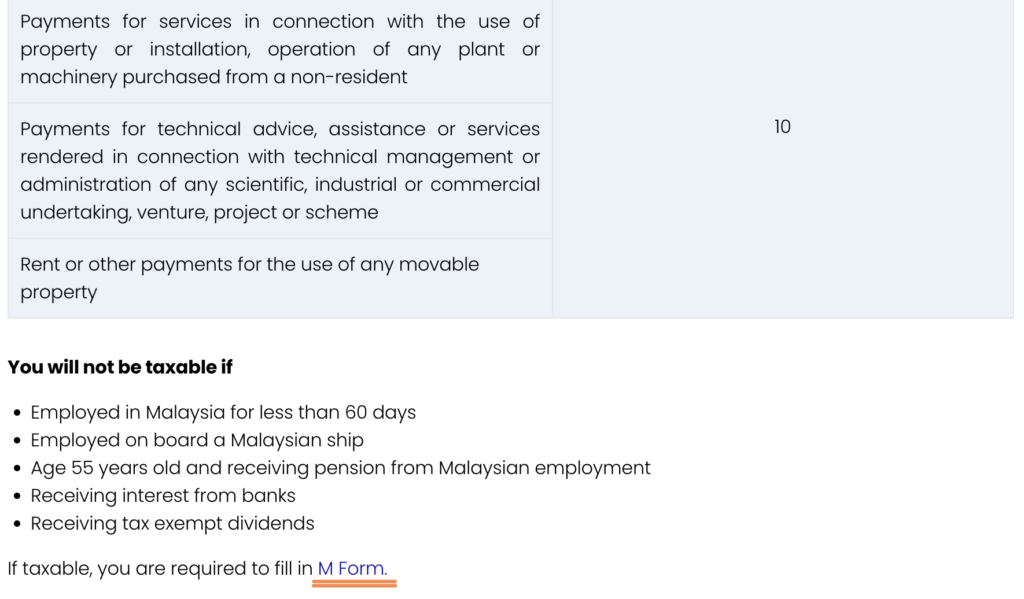
非居住者(Non-Resident)とは、
- 1/1から12/31までの期間で、マレーシアでの滞在が182日に満たない
- 税率は一律30%
- 税の申告はe-M Formを使用する
| Non-Resident | Resident | |
| 滞在日数 | 182日未満 | 182日以上 |
| 税率 | 30% | 累進課税 |
| 所得控除申請 | 不可 | 可 |
| 申請Form | e-M Form | BE Form |
適任者
- スマホで申告をしたい
- 初めての申告
- 会社員
- 昨年のマレーシア滞在数が182日未満
オンラインの特徴
- 申告期間は、2023/3/1~2023/4/30
- 税務署に足を運ばない
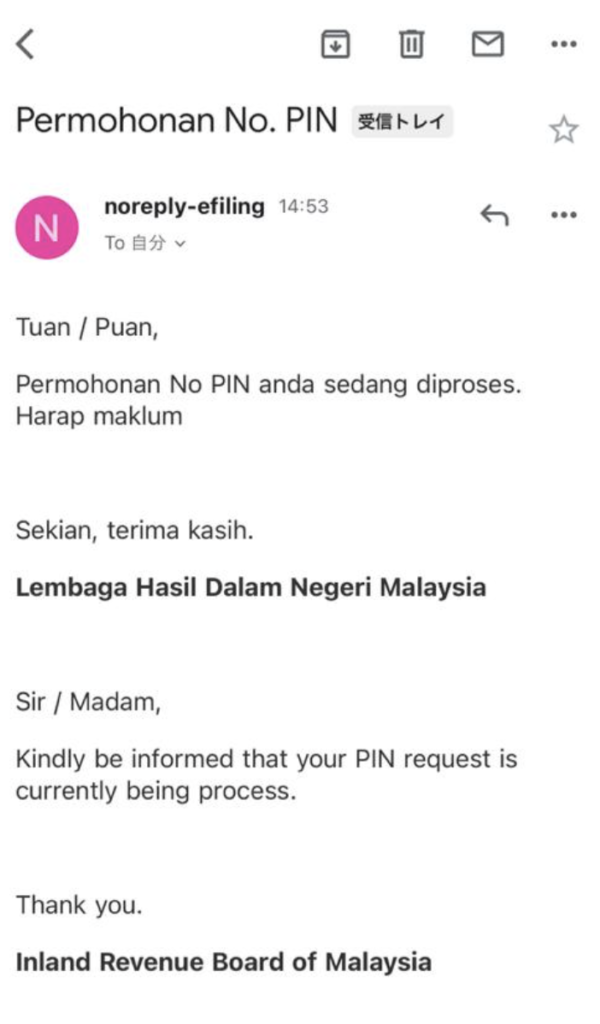
- PINリクエストの返信に通常5営業日かかる
- 所得控除用の領収書の添付不要
※2022年度分の税所得控除リスト(最新版)についてはこちら
用意する情報
PIN番号リクエスト時
- パスポート番号
- パスポートの顔写真のページのスクショ
- メールアドレス
PIN番号取得以降
- セキュリティーフレーズ(任意)
- ログインパスワード(任意)
- 銀行アカウント番号
- EA Form(会社が発行)
PIN番号リクエスト
税申告が初めての場合は、PIN番号のリクエストが必要
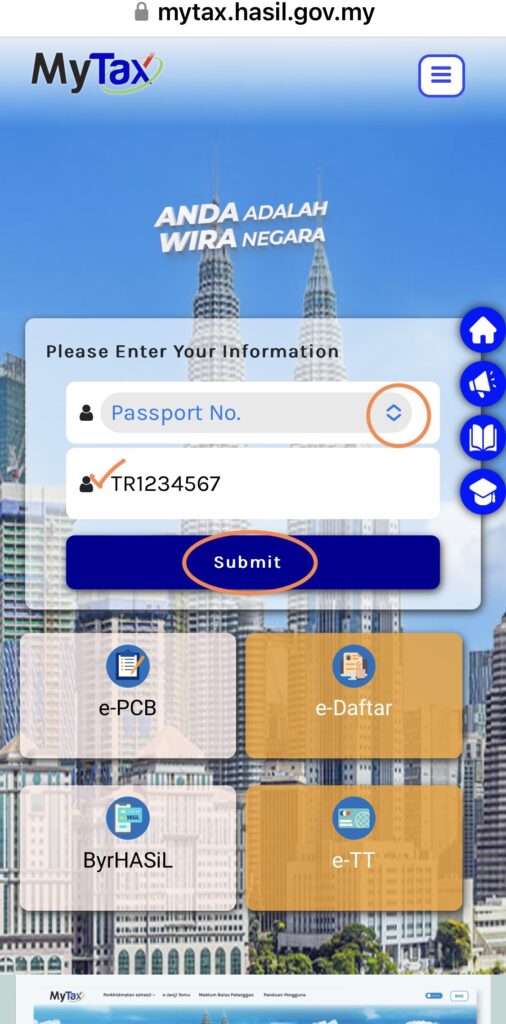
MyTaxへアクセス
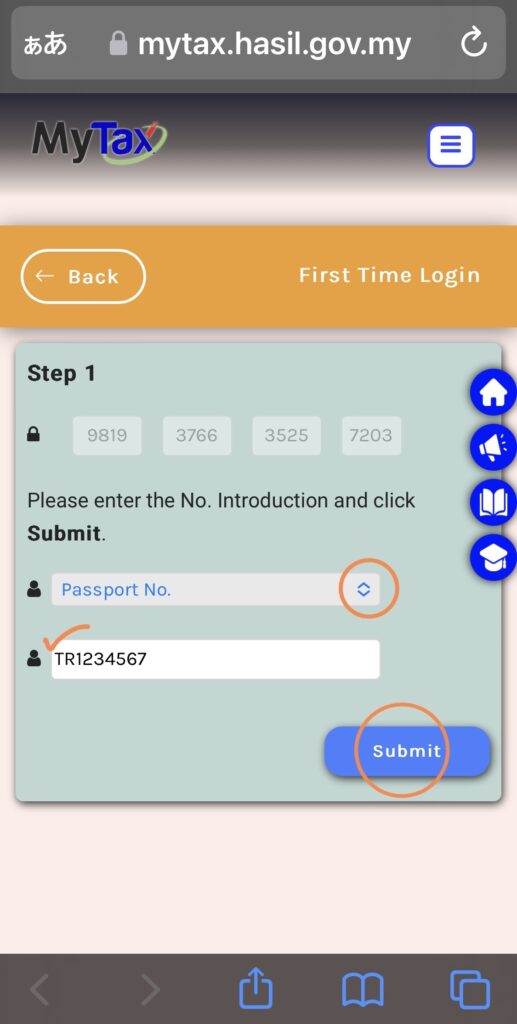
①「Passport No.」を選択してからパスポート番号を入力し、「Submit」をタップ
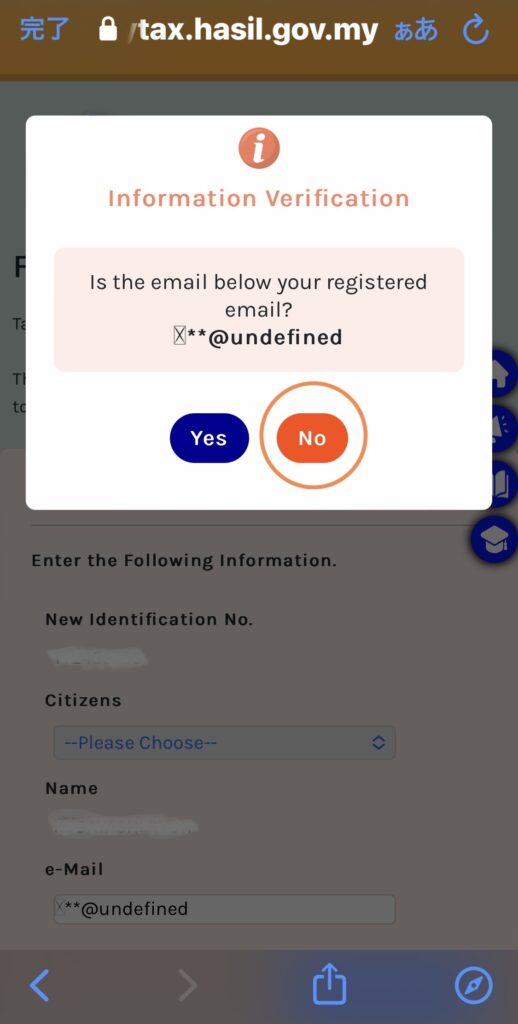
②「e-CP55D」をタップ

③「No」をタップ
④ 国籍、メールアドレスを選択/入力、および「Upload」よりパスポートの顔写真のページのスクショをアップロードし、「Submit」をタップ
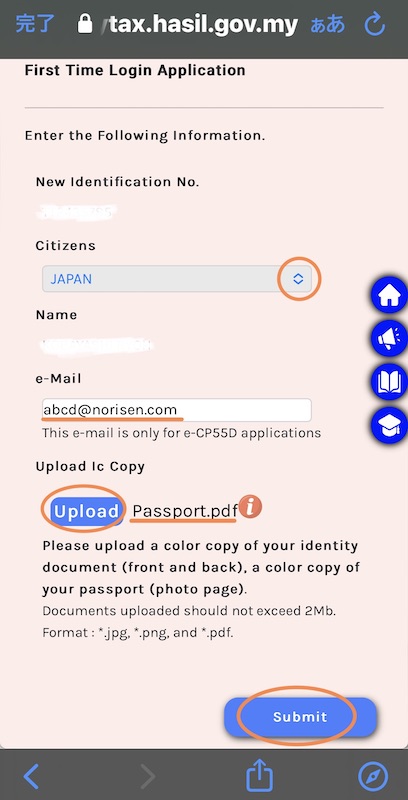
⑤ リクエスト完了
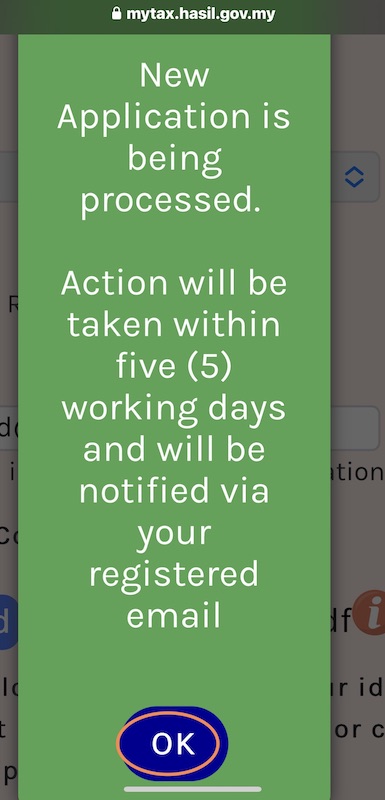
⑥ リクエスト後、すぐに受付完了メールが届く
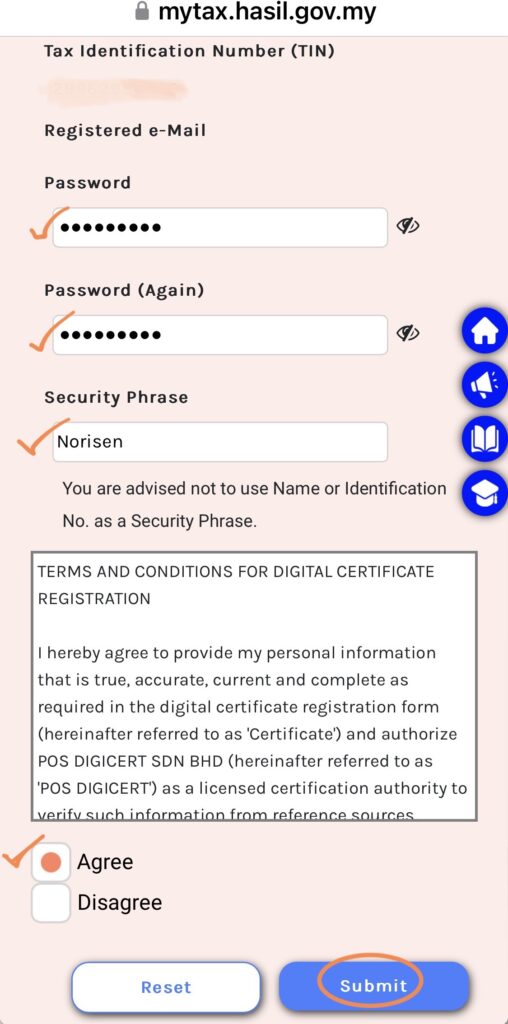
パスワードの設定
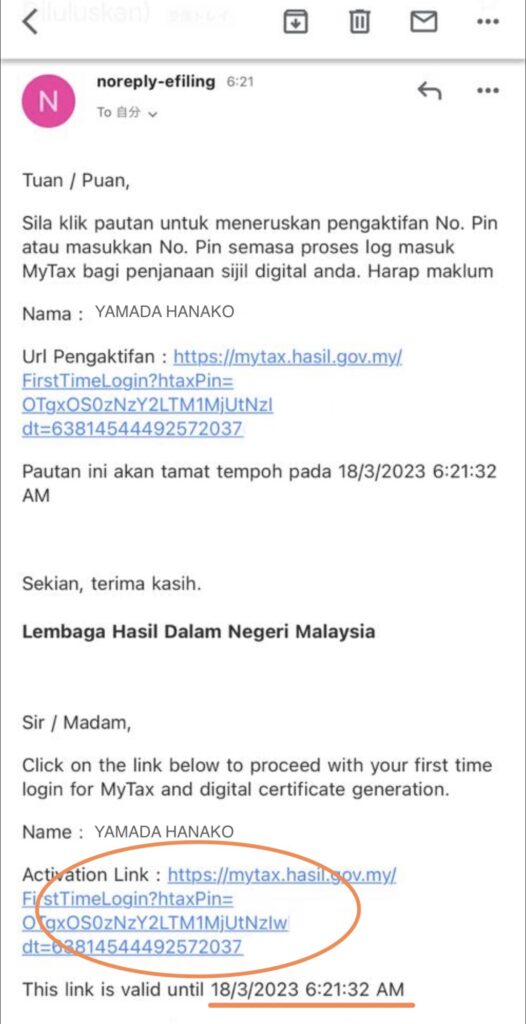
およそ5日程度でActivation Linkのメールが届く(URLの有効期限はメール受信から48時間)
①「Activation Link」をタップ
② パスポートを選択し、パスポート番号を入力し、「Submit」をタップ
パスワード:後からでも変更可能で、1文字以上の大文字、小文字、及び数字を含む半角8~12文字
セキュリティーフレーズ:ログイン時にパスポート番号を入力すると表示されるもの
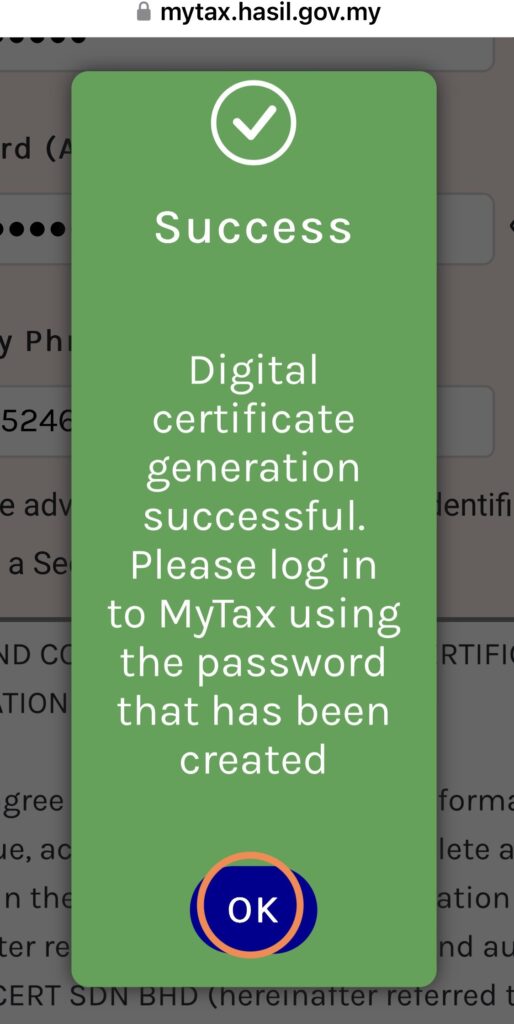
④「OK」をタップでパスワード設定完了
MyTaxへのログイン
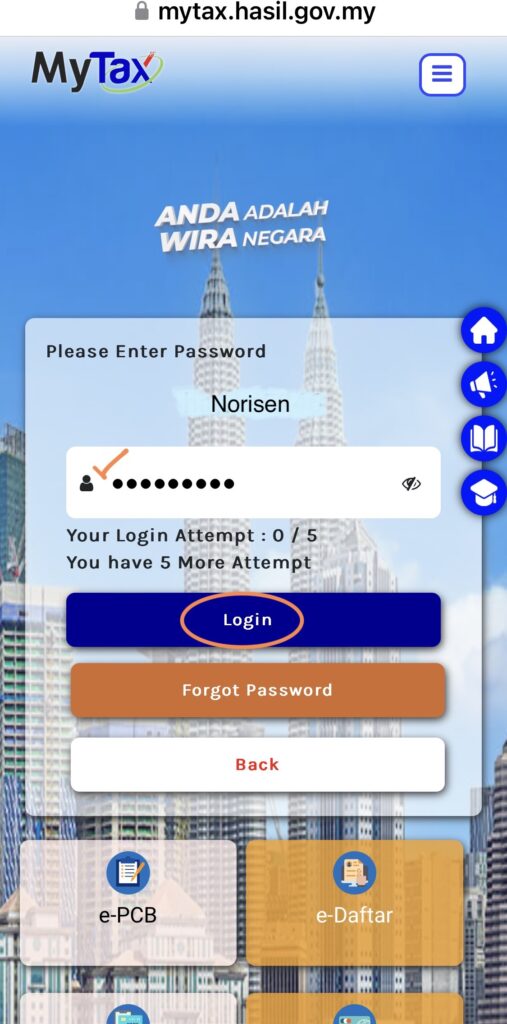
①「Passport No.」を選択してからパスポート番号を入力し、「Submit」をタップ
② パスワードを入力し、「Login」をタップ
※登録したセキュリティーコード「Norisen」が表示される
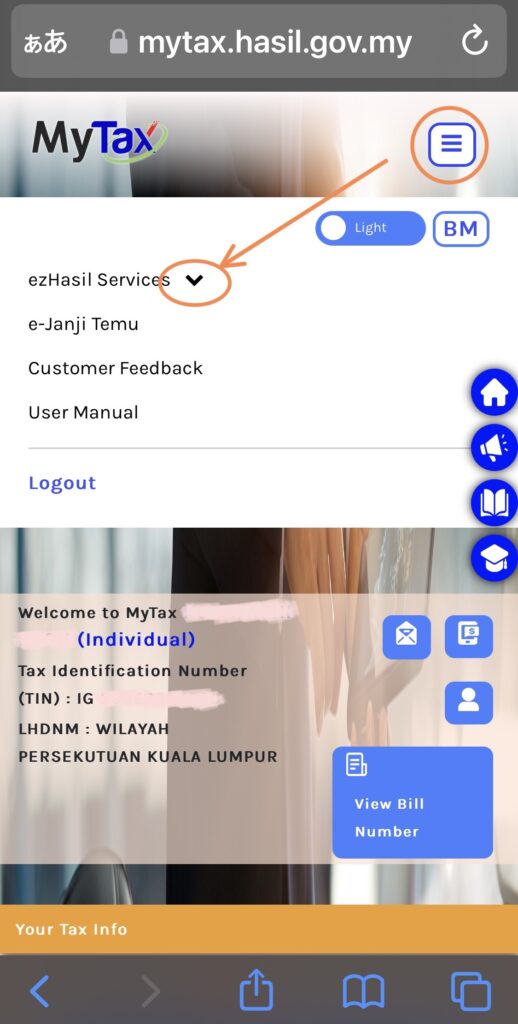
③ 右上の四角いアイコン→プルダウンボタンと進み、
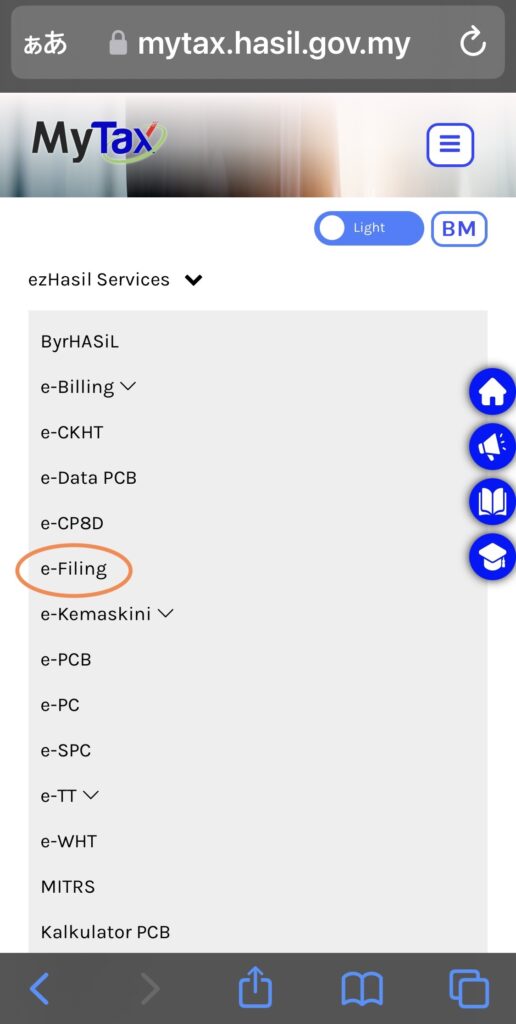
④「e-Filing」をタップ
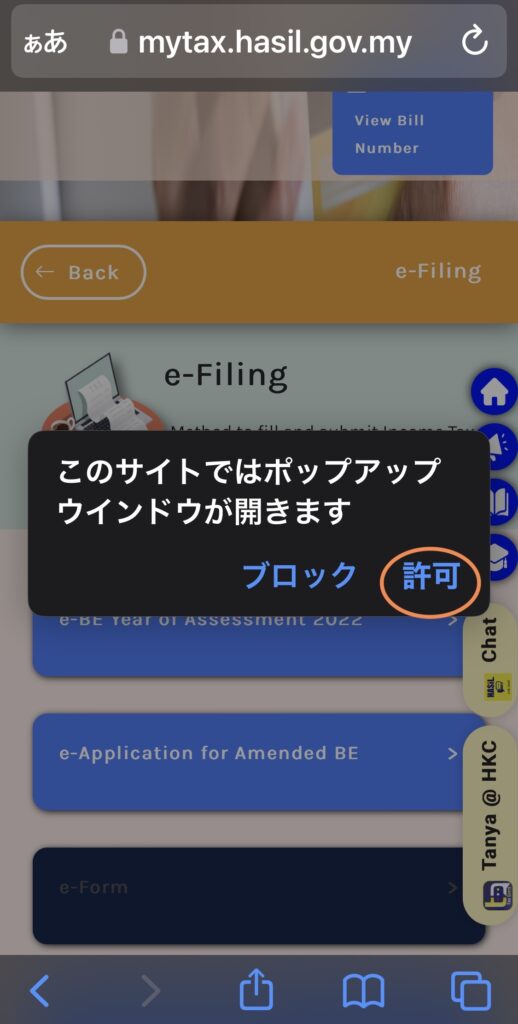
⑤「e-Form」をタップ
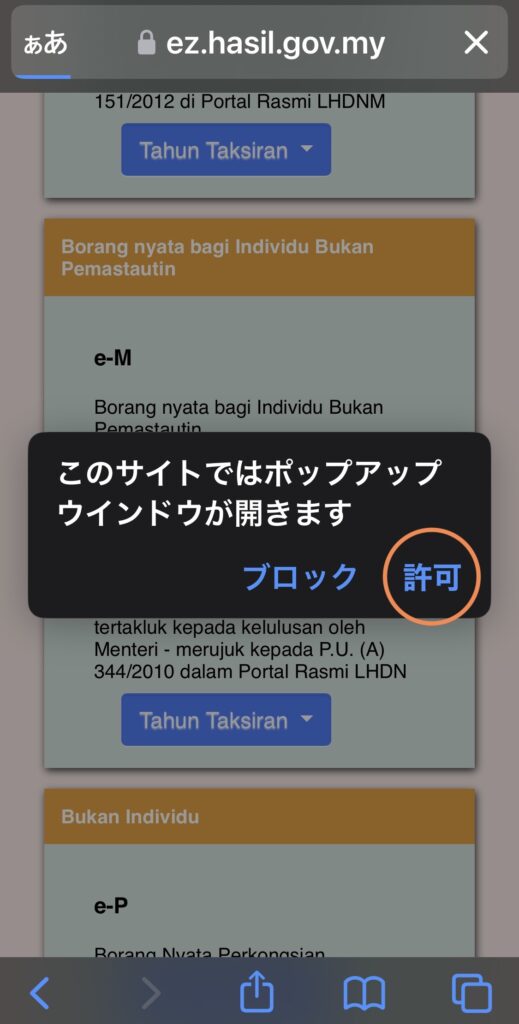
⑥ポップアップのアラームが出たら、「許可」をタップ
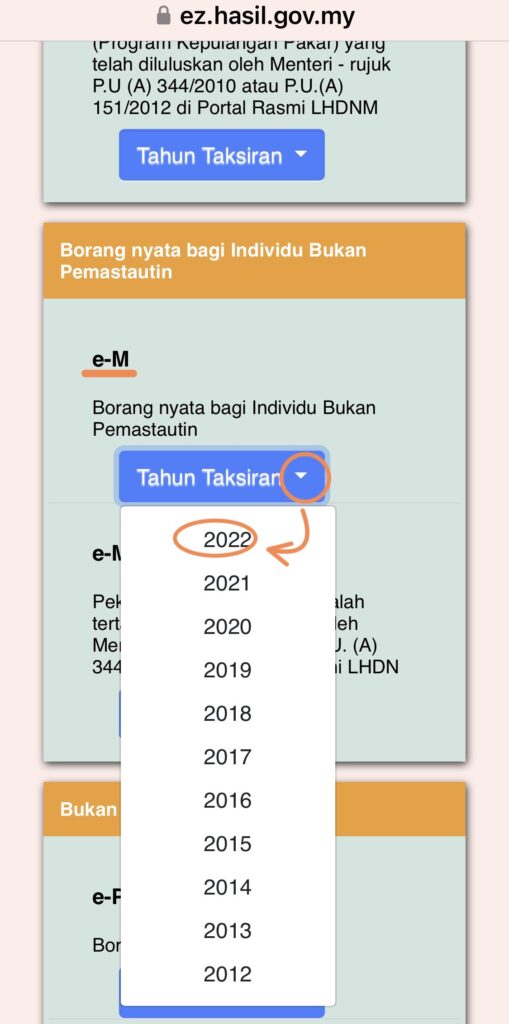
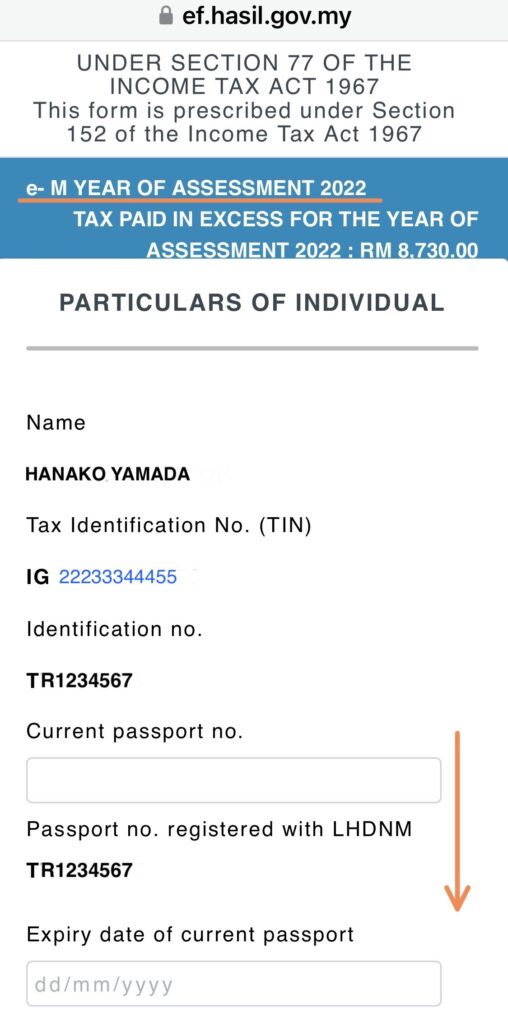
⑦「e-M」の「Tahun Taksiran」から「2022」をタップ
⑧ポップアップのアラームが出たら、「許可」をタップ
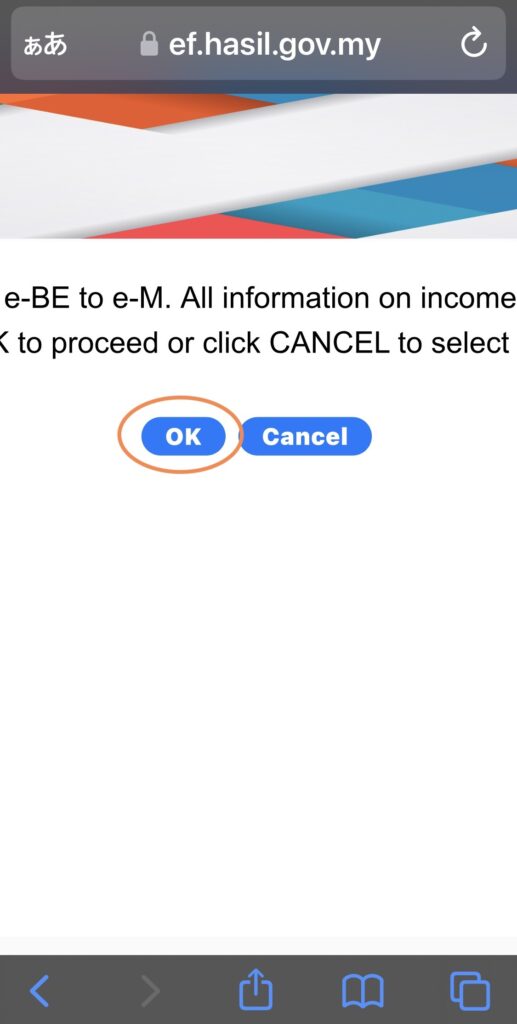
⑨ Formの切り替えのアラームが出たら「OK」をタップ
個人情報の入力
① 下へスクロール
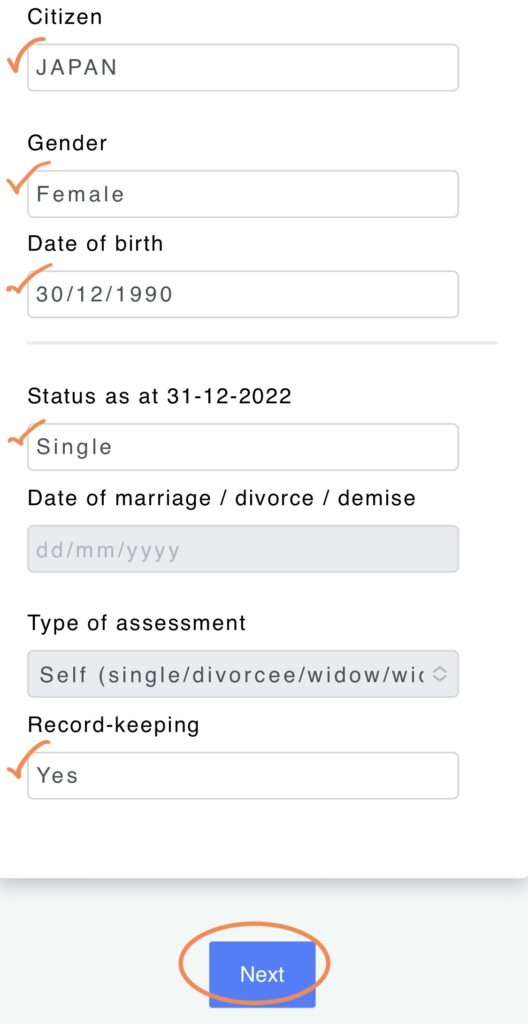
② 国籍、性別、生年月日、婚姻状況を確認もしくは入力/選択し、「Next」をタップ
※「Record-keeping」は「Yes」を選択
③ 電話番号、国(電話番号)を入力/選択
「Tax borne〜」は「Yes」を選択し、下へスクロール
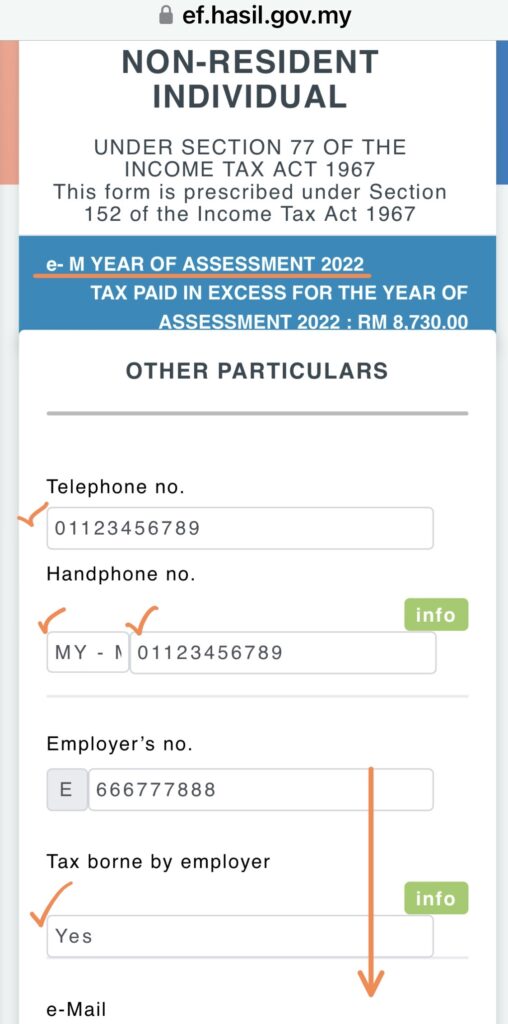
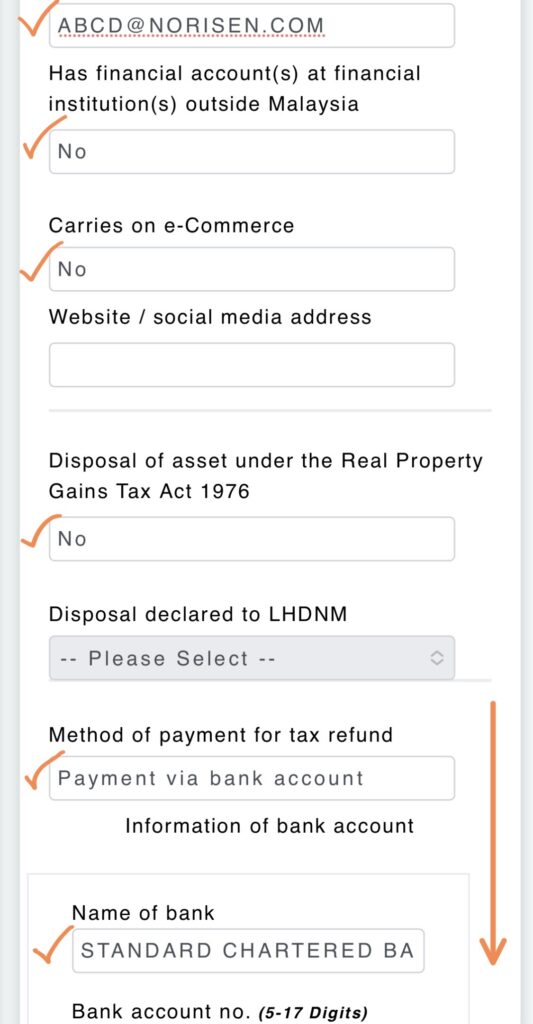
④ メールアドレスを入力
「Has financial〜」、「Carries on〜」および「Disposal of〜」はNoを選択
余剰税金還付方法(Payment via bank account)および還付先(銀行名/アカウント番号)を選択/入力し、下へスクロール
⑤ 下へスクロール
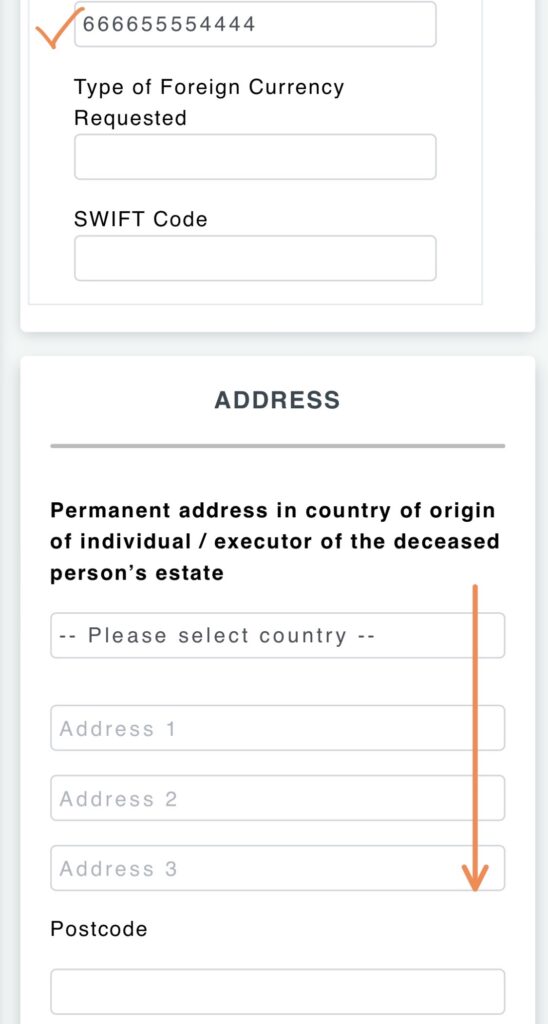
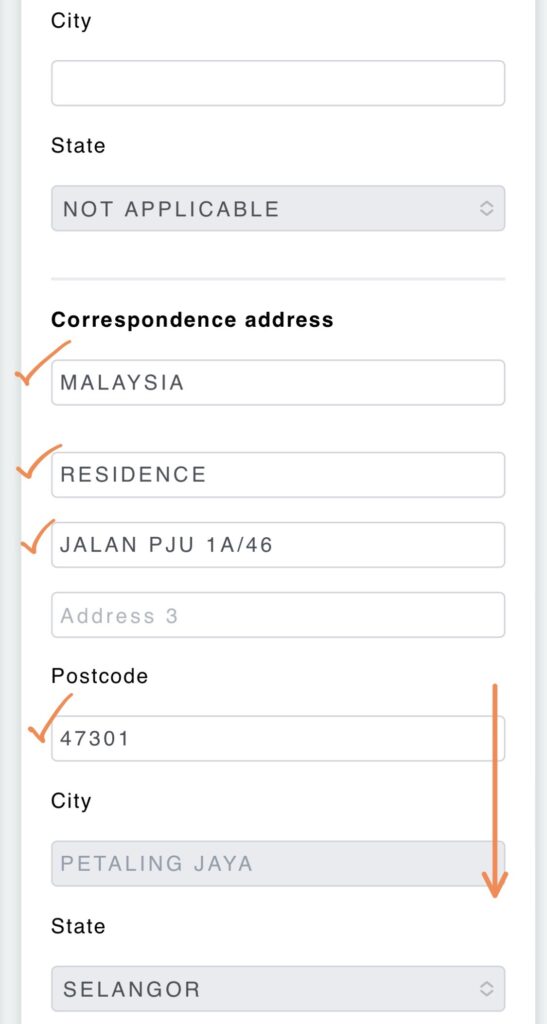
⑥ 郵便を受け取りたい住所を入力し、下へスクロール
⑦ 下へスクロール
⑧「Next」をタップ
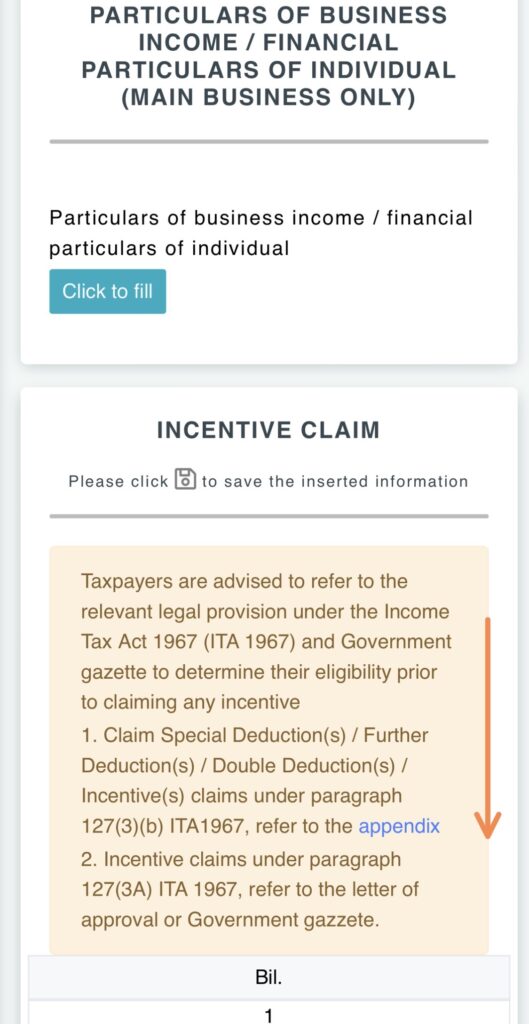
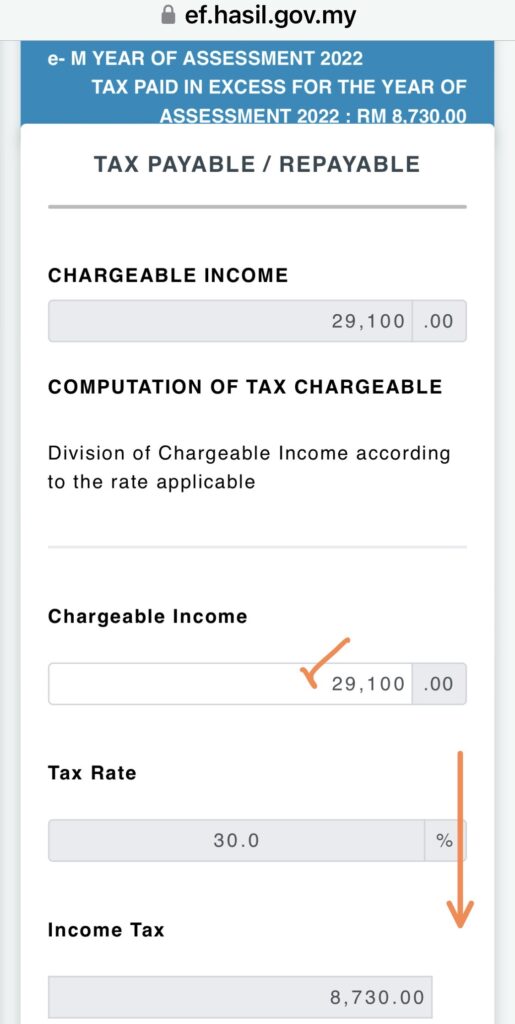
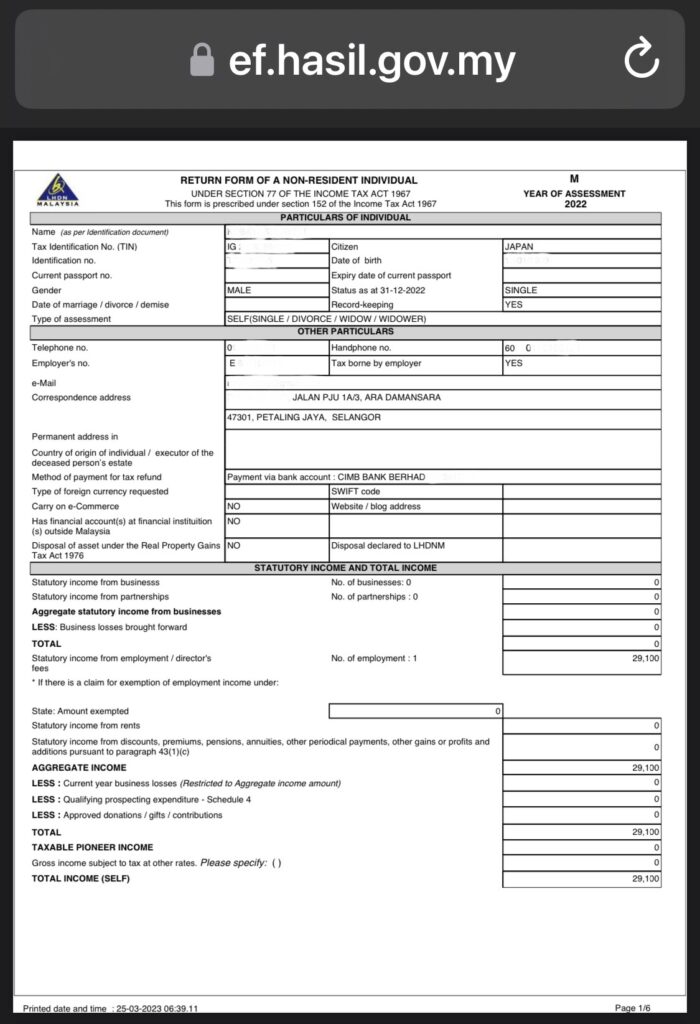
税対象所得金額の入力
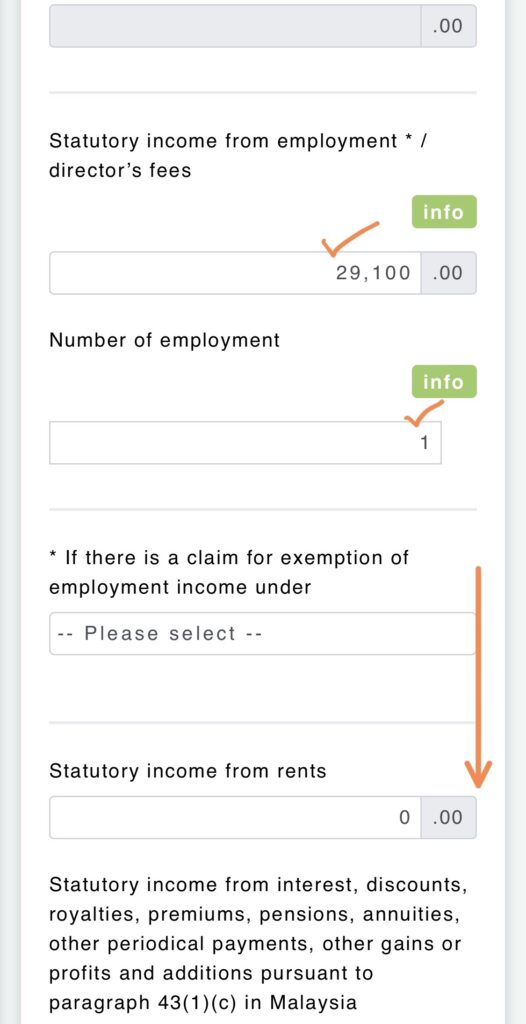
① 下へスクロール
② EA Formに記載されている税対象所得金額及び、給与支給元の会社の数を入力し、下へスクロール
※「Statutory income from employment」→税対象所得金額
※「Number of employment」→会社の数
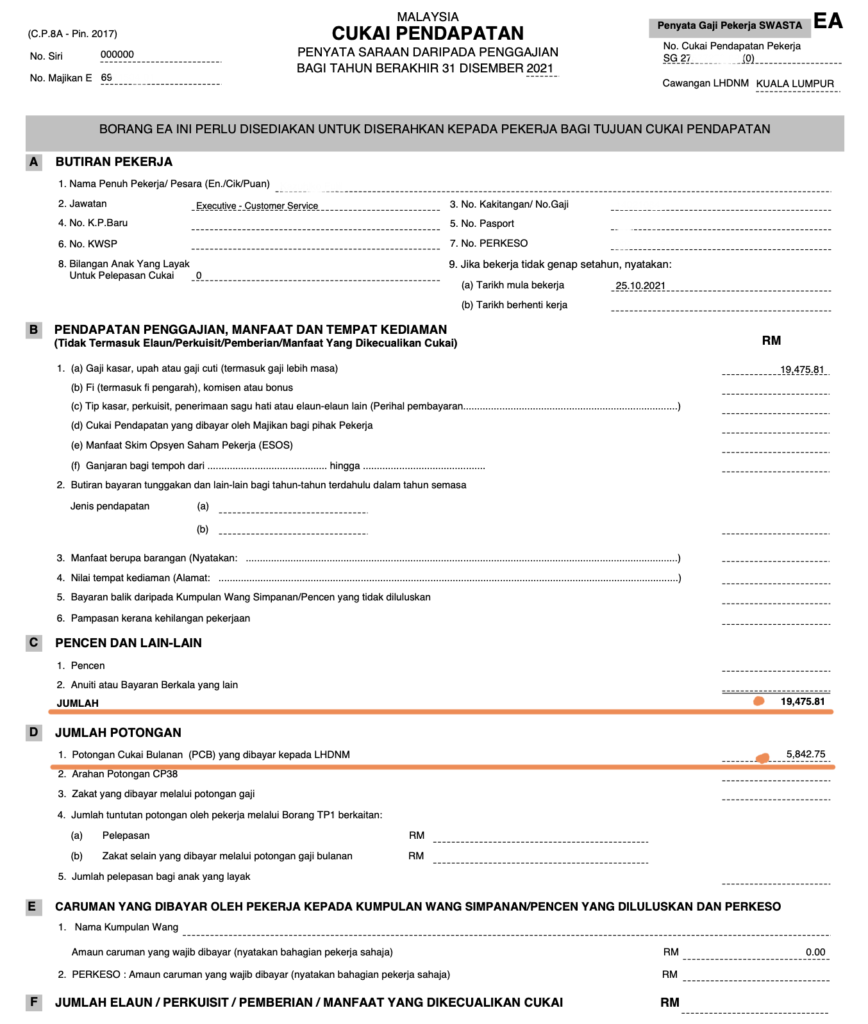
※ EA Formの記載例
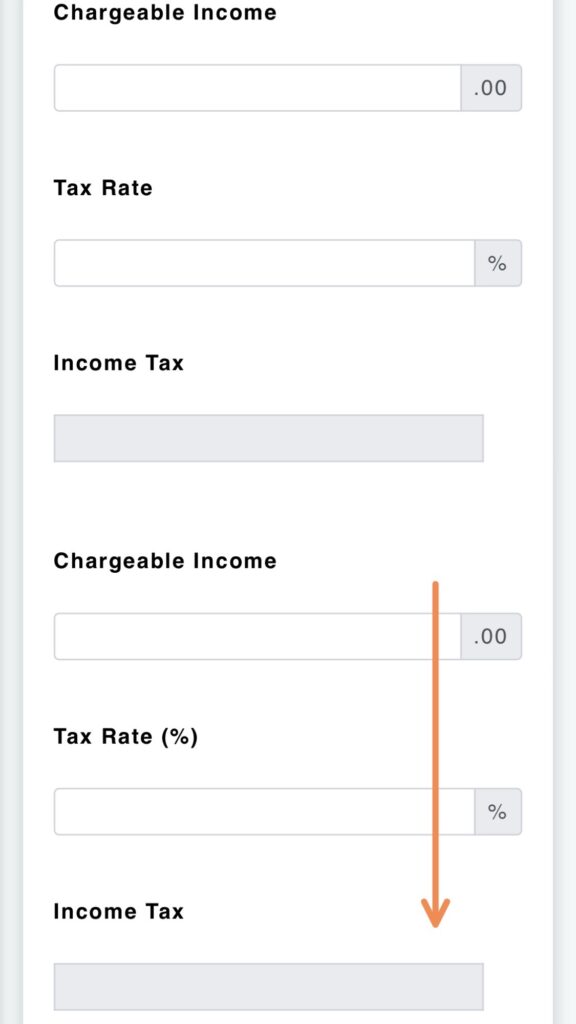
③ 下へスクロール
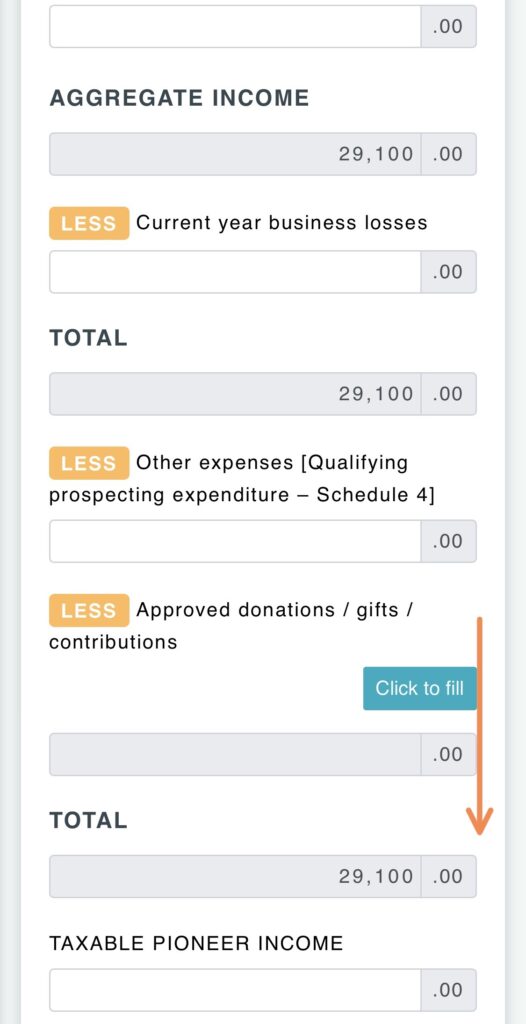
④ 下へスクロール
※項目MTDがEA Formの納付済み税金額と同じ金額になっていることを確認
⑤「Next」をタップ
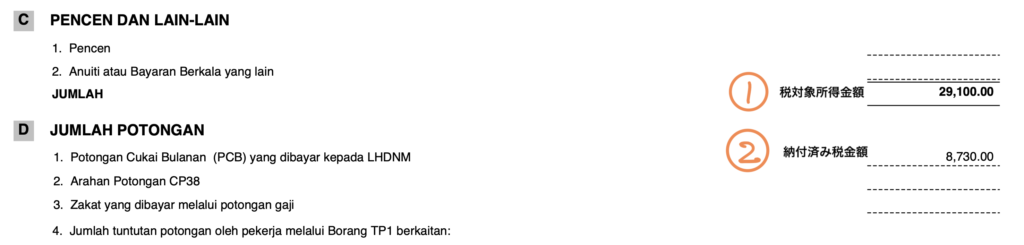
ちょっと一休み(EA Form)
EA Formの税対象所得金額と納付済み税金額を確認する方法
税対象所得金額:CとDの間にあるJUMLAH(合計)(例:101,253.67リンギット)
納付済み税金額:D-1(例:9,073.30リンギット)
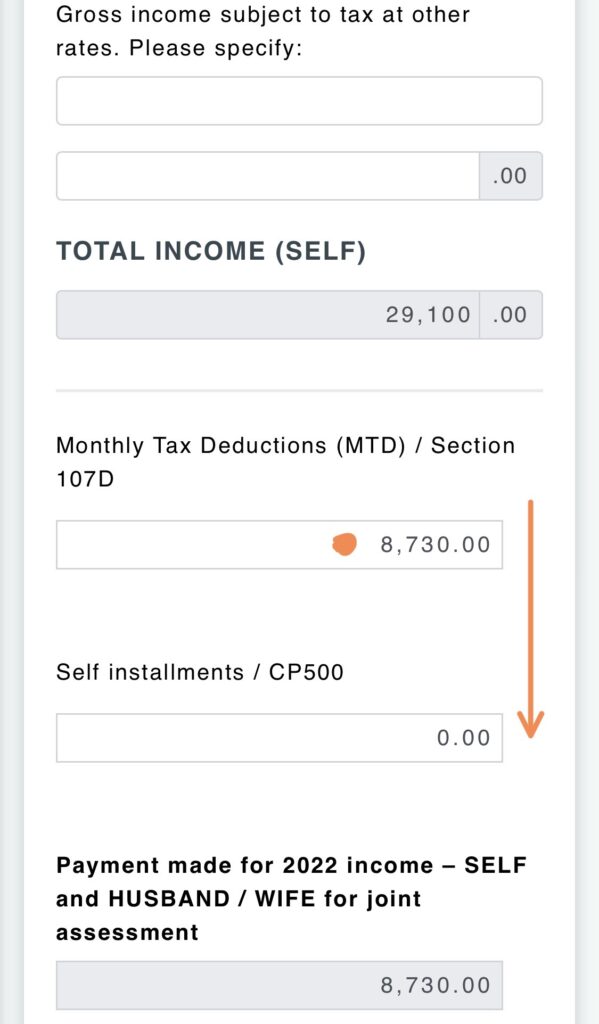
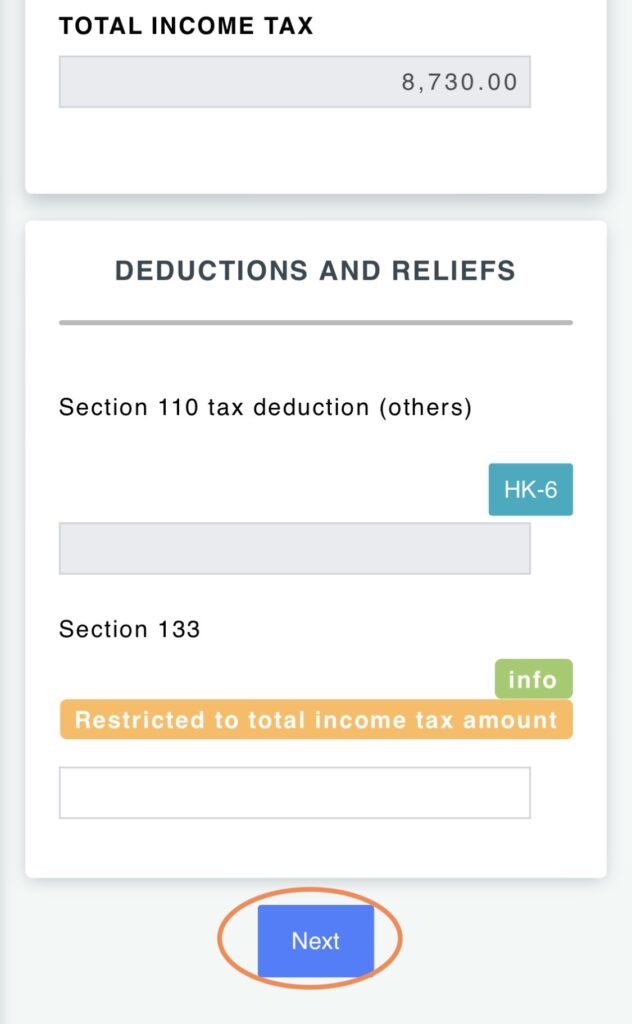
納付済み税金額の入力
①「Chargeable Income」の下にEA Formの納付済み税金額を入力し、下へスクロール
② 下へスクロール
③「Next」をタップ
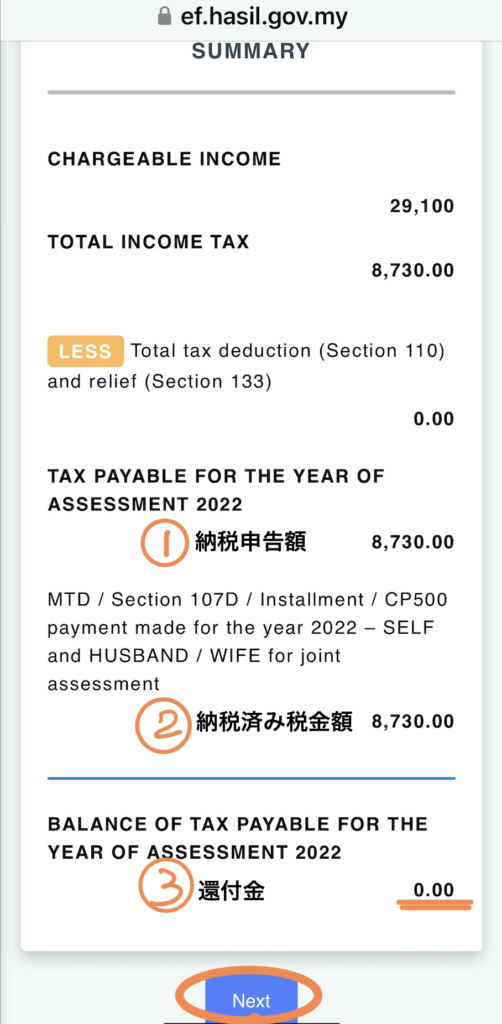
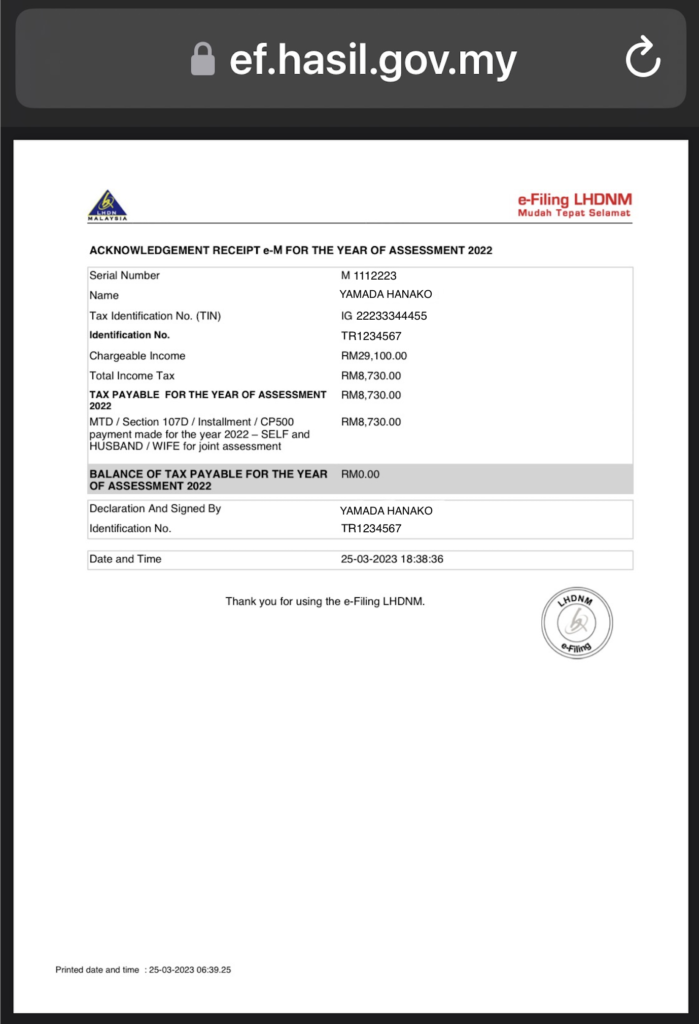
サマリーと確定
① 納税申告額、納税済み税金額、及び還付金を確認し、「Next」をタップ
※例では、還付金はRM0
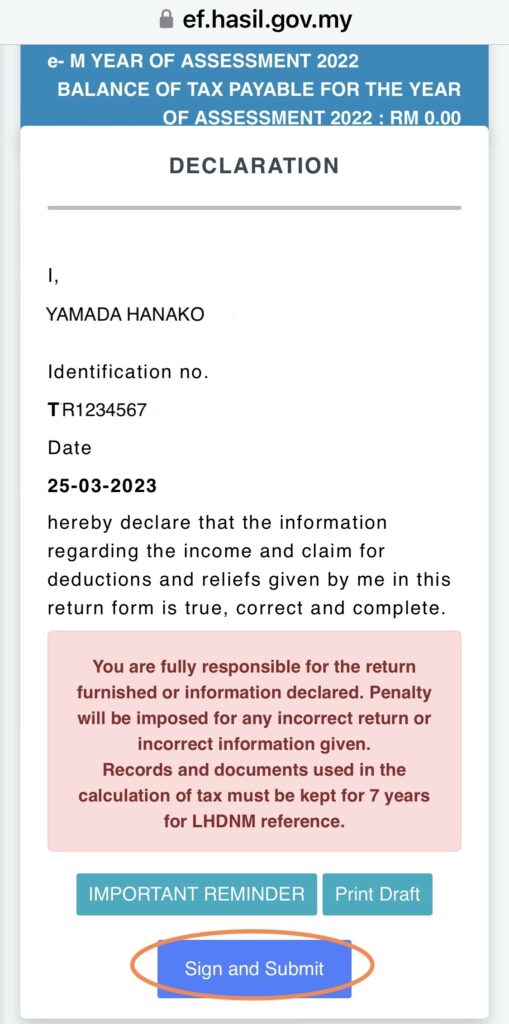
②「Sign and Submit」をタップ
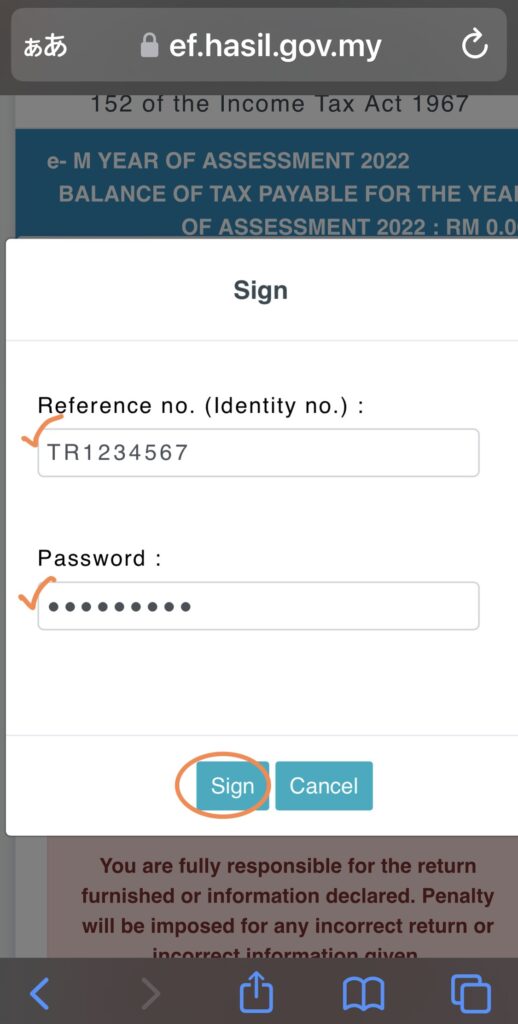
③ パスポート番号及びパスワードを入力し、「Sign」をタップして申告確定
領収書等の保存
確定後は、「Print Ac〜」及び「Print e-〜」をクリックして、書類をダウンロード
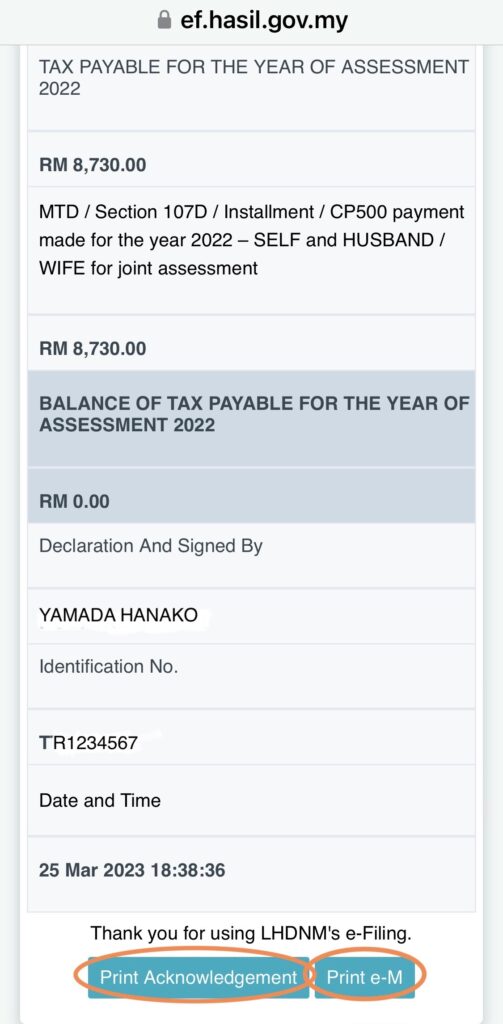
7年間保存だす
終わりに
今年、レジデンスの条件をクリア(7月あたり)すれば、2022年分をレジデンス扱いで再計算してもらえるだす\(^o^)/
最近のコメント